Removing the Rear Roof
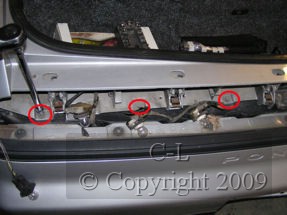
1 - Remove 6 screws at the lower back end of the panel (under the tail lamps assemblies)
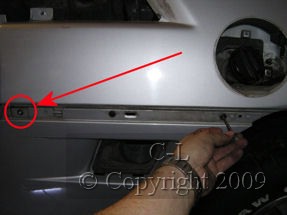
2 - Remove 2 screws on upper rear fender section of the roof panel assembly (2 on left side and 2 on right side)

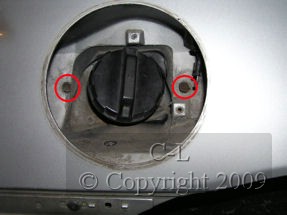
3 - Remove the 3 screws in the gas filler section

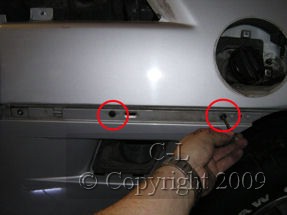
4 - Remove screw at front sail panel (one on the left side and one on the right side)

5 - Remove the 2 plastic rivets on the rear fender (there is 2 plastic rivet on each side)
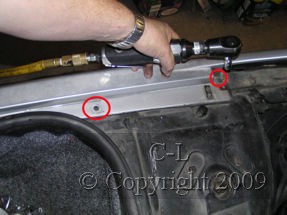
6 - Drill out 1 metal rivets on the rear fender (there is 1 metal rivet on each side)
7 - Make sure that the upper 3 roof nuts have already been removed from inside of the car. Otherwise, the upper seat belts, interior rear quarter trim panels, interior upper garnish molding, sunroof latch cover, sunroof trim, coat hangers and headliner have to be removed to gain access to the 3 rear roof nuts.


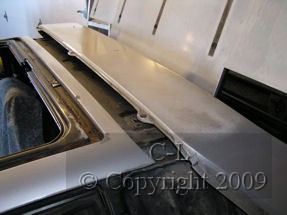
8 - Carefully lift the roof rear assembly upward


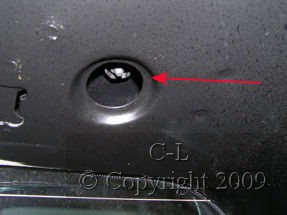
9 - Remove the gas filler door latch cable (with a pair of pliers, push the rubber sleeve through the hole, then, on the back side, pull the cable out)


10 - Remove the rear roof assembly.
Note: The front roof may have to be loosenned or removed in order to be able to remove the rear roof.
Schematic:
